Overview
The Agenda feature allows you to send an automatic overview of upcoming appointments via email to specific recipients.
This feature is available starting with the Plus version
Create Recipient
Before you can create a calendar, you must create a recipient in the settings under the menu item Team. This recipient will receive the agenda via email. In the Agenda tab, select the appropriate recipient.
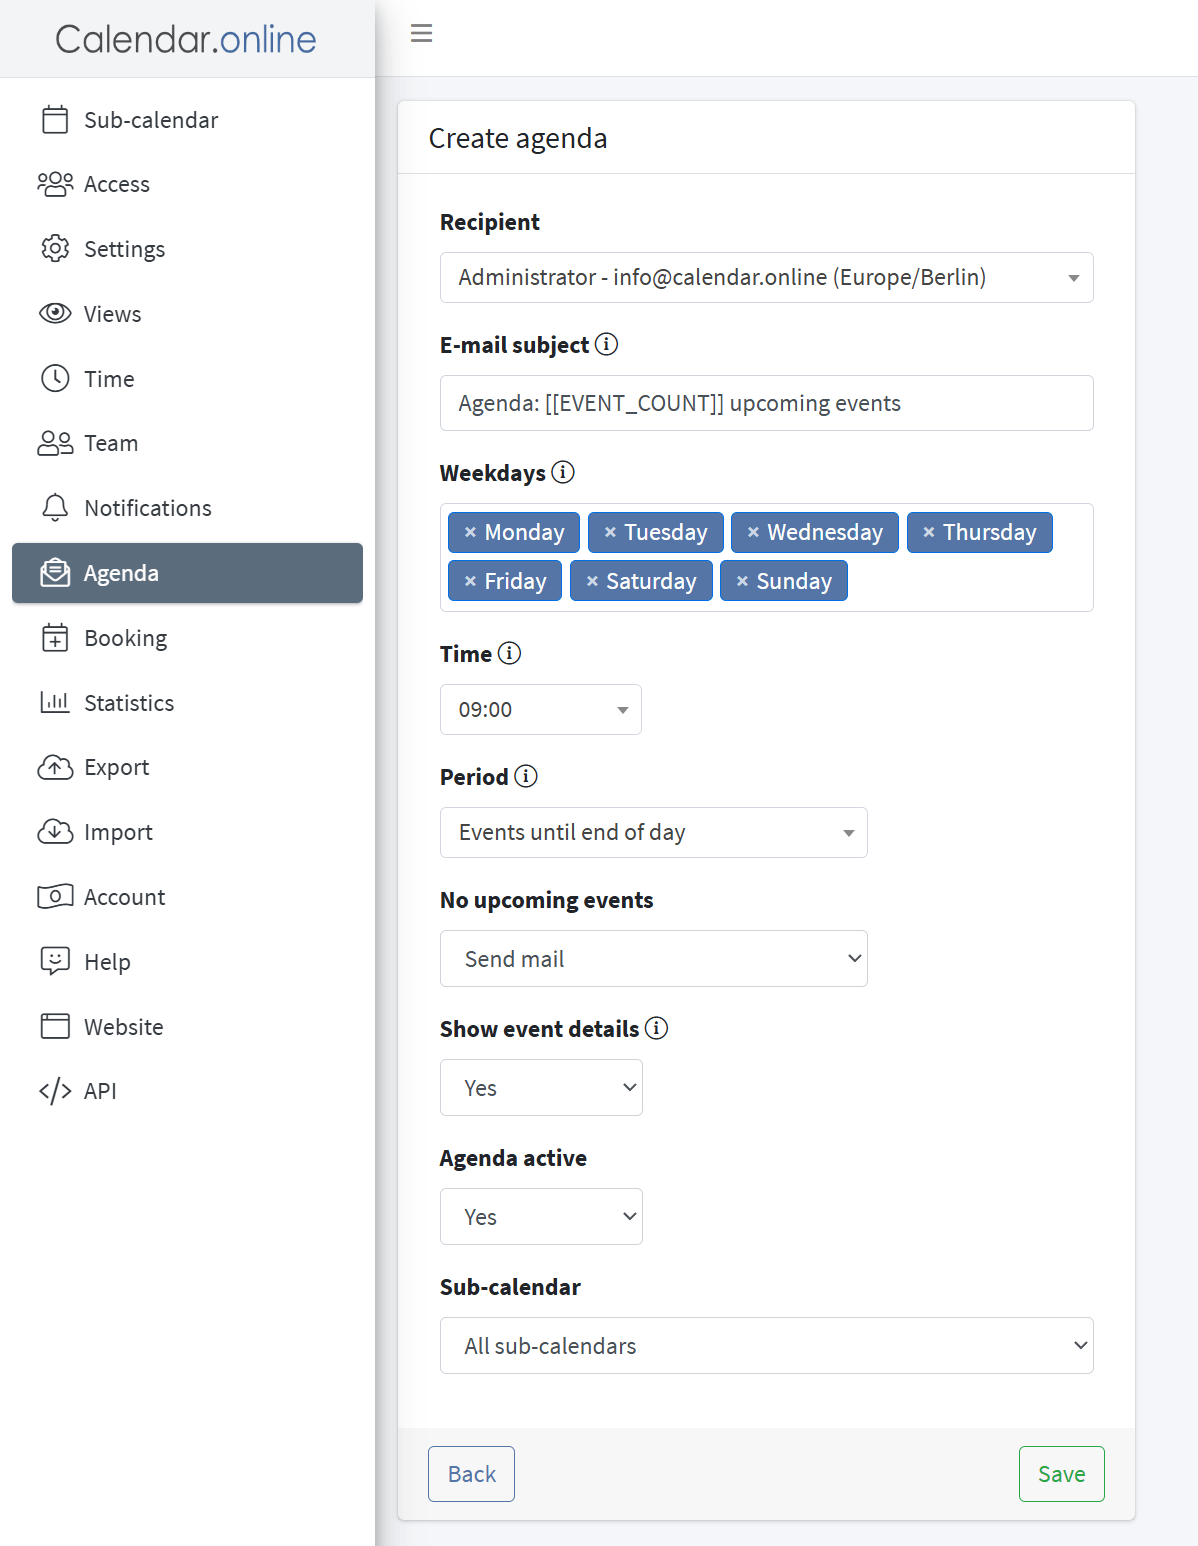
Email Subject
Set an appropriate subject for the agenda email. This appears in the subject line of the message and helps the recipient quickly recognize the overview.
Weekdays
Specify on which weekdays the agenda should be sent. You can select individual days of the week or daily delivery.
Time
Specify the time at which the email with the agenda should be sent.
Time Period
Set the time period for which appointments are displayed in the agenda. For example, you can set a preview for the current day or the coming days.
If no appointments are scheduled
If no appointments are entered for a selected day, you can decide whether an email should still be sent or not.
Show appointment details
Select which details of the appointments should be displayed in the calendar. For example, you can show only the titles, times, and sub-calendars of the appointments, or display additional appointment details.
Calendar active
To activate the calendar function, set the corresponding switch to active. Otherwise, the calendar will be saved but will not be sent.
Subcalendars
If you use multiple subcalendars, you can select which ones should be included in the calendar. This allows you to control which events appear in the overview.
Once all settings have been configured, the calendar will be sent automatically at the specified times.
Click Save to create the calendar.