Overview
With the booking feature, customers and prospects can book appointments directly in your calendar. Only available time slots are automatically displayed. The appointment duration can be flexibly set between 3 minutes and 24 hours.
The booking function is available in three versions:
Basic Version: 1 booking product/link
Plus Version: Up to 5 booking products/links
Premium Version: Unlimited booking products/links
Booking page
The booking page can be accessed via a booking link, e.g.:
https://calendar.online/b/f4345f5b10ce4889
If multiple products or services have been assigned to a link, a selection page appears first. The customer selects the desired product there before booking an appointment.
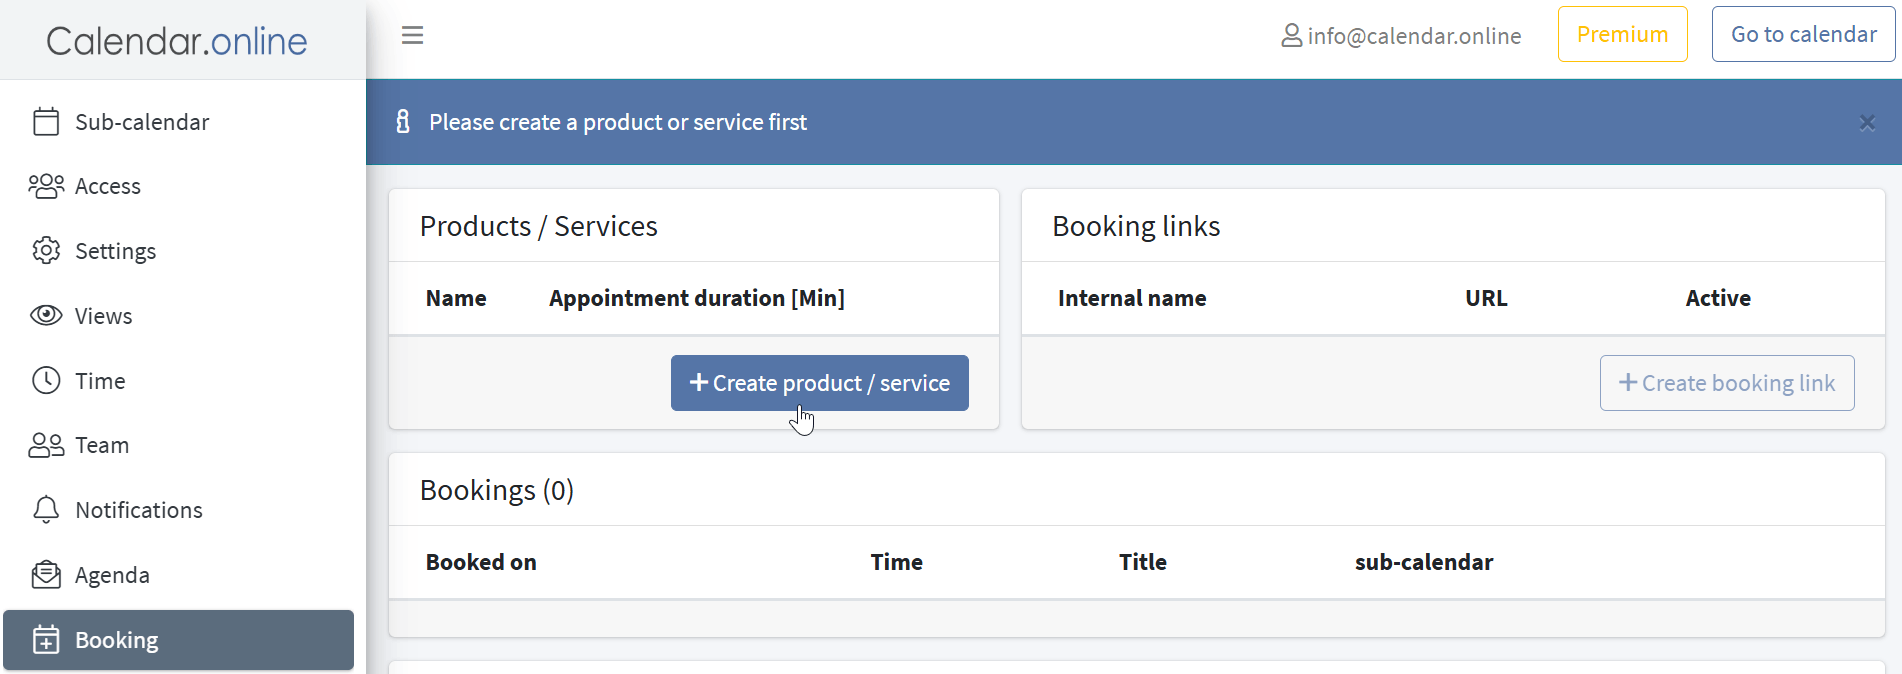
Create a product or service
To create a booking page, you must first define a product or a service. In doing so, you specify which
details and conditions should apply to the booking.
Click on the gear icon in the top right corner.
-
Switch to the Booking tab and click on + Create Product/Service
-
General Information
Provider (optional): Enter the name of the provider, if relevant.
Name (required): Assign a descriptive name for your product or service.
Description (optional): Add a short description to provide further information.
-
Time settings
Appointment duration: Select a duration between 3 minutes and 24 hours.
Minimum Appointment Interval: Specify how much time should remain free before and after the booking.
-
Time intervals: Define the intervals at which bookable time slots should be available (e.g., automatically, every 15
minutes, hourly, etc.).
Start date (optional): If bookings should only be possible starting from a specific date, set it here.
-
End date (optional): If the booking should only be available for a limited period, you can specify an end date
.
-
Define available times
Specify on which days and at what times bookings are possible:
Monday - Sunday: Enable or disable individual days of the week and define specific time slots.
-
Subcalendars for bookings
Save bookings to subcalendar: Select the subcalendar in which new bookings will be saved.
-
Find available slots in subcalendars: Specify which subcalendars should be considered when determining available times
.
-
Additional options
Location (optional): If your service takes place at a specific location, you can specify it here.
Image (optional): Upload an image to make your product more visually appealing.
Price (optional): If the booking is subject to a fee, enter the price here.
Currency: Select the desired currency.
Notify admin via email: Receive an email notification as soon as a new booking is made.
-
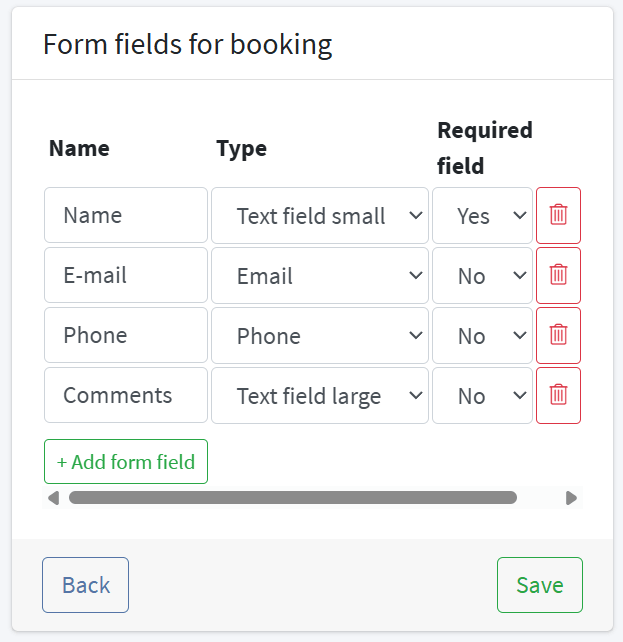
Form fields for the booking
Define the required fields for the customer:
After you have made all the settings, you can save the product or service and assign it to a booking link.
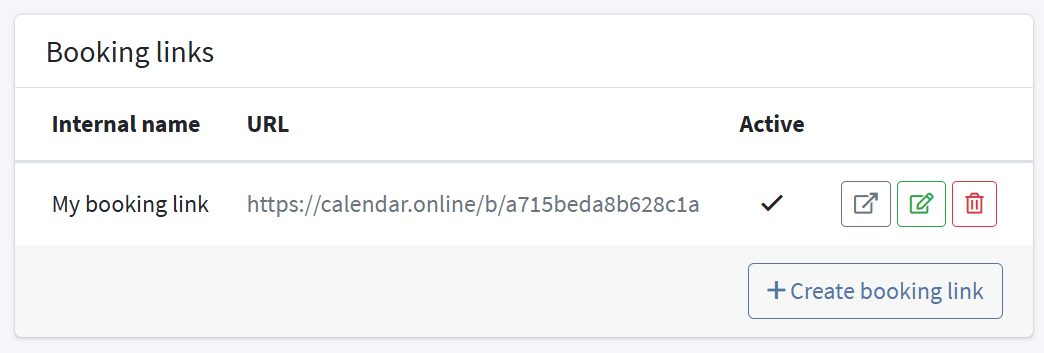
Create Booking Link
-
Create Booking Link
Back in the Booking tab, go to + Create Booking Link.
-
Internal Name
Enter a name.
-
Assign Product/Service
At least one product must be assigned.
-
Save
Save the booking link.
-
Share booking link
In the Booking tab, the URL of the booking link is now displayed. Customers can book available appointments directly via the link.
Booking for Customers
-
Open Booking Page
Open the booking link.
-
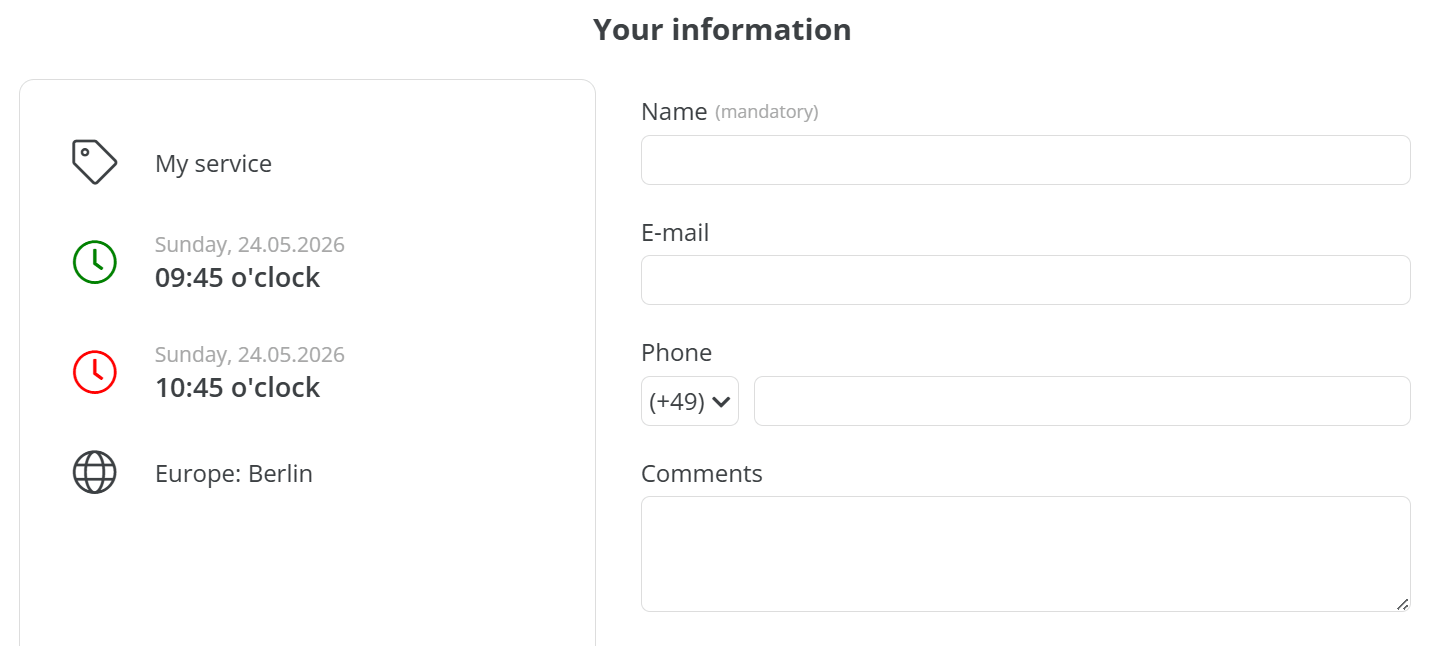
Booking overview
After you have received the essential information about the booking product / service, click Next to select a date
-
Select a date
Select an available date from the calendar and click Next
-
Select a time
Select an available time and click Next
-
Enter booking details
On the left side, you will see the details of the booked appointment. Enter your name in the contact form. Optionally, you can add your email address, phone number, and comments.
-
Confirm booking
Click on Book to confirm the booking.